Quantcast
Channel: Kasia Polkowska Art
Viewing all 416 articles
Browse latest View live

Adriana's First Mosaic!

$
0
0
Above is my nice Adriana with her hamster puppet and the completed stained glass mosaic she created while visiting me this August.  Below are a few process shots of her in action!

Adriana learned how to use the glass cutting and breaking tools when I visited during Easter while we created a family mosaic kitty mural in my sister's veggie garden.  During her trip to Colorado, she picked up right where she left off while creating her very own mosaic with just a little bit of my help and guidance =)

Here I am passing on the grouting torch to the next generation =)

 Here is Adriana very focused and doing a great job at grouting her stained glass mosaic sun.


All finished and she didn't even get her dress dirty - she's a natural!


Mosaic Flower Series

$
0
0
Visit my open facebook page "Kasia Mosaics" to see lots more up to date process shots etc. https://www.facebook.com/KasiaMosaics - hope you take a look and enjoy!

  Sunflower, stained glass mosaic, 11"x11" (12"x12" framed), 2013   sold

 Colorado Columbine, stained glass mosaic, 11"x11" (12"x12" framed), 2013   available for purchase

Red Zinnia, stained glass mosaic, 11"x11" (12"x12" framed), 2013   available for purchase

 Purple Lotus, stained glass mosaic, 11"x11" (12"x12" framed), 2013   available for purchase

Orange Rose, stained glass mosaic, 11"x11" (12"x12" framed), 2013   available for purchase 

 Above are the rough sketches I created for the mosaics.

Here is a shot of the sunflower mosaic in progress.  Its hard to choose which flower from this series is my favorite, but if I had to choose, it might be the sunflower.  Before choosing the color palette for this flower, I figured I'd do the classic sunflower with the brown center ... somehow when I started looking at my glass, the brown didn't make sense for this one, I liked the look of the less common greener center.

Here is a shot of the Colorado columbine in progress.  Through out the summer on various hikes here in the mountains of Colorado, I have seen these beautiful flowers along the trail and was inspired to create one of my own.

Here is a shot of the zinnia in progress.  Zinnia's are Kyle's favorite flower to plant in the garden.  He is really the one who has brought it to my attention.  Seeing how much he loves these flowers, I just had to include it in my series.  I feel that every part of the flower lends itself perfectly to being recreated with a mosaic pattern.  This flower was particularly fun to create and I plan to revisit it in a variety of colors in the future.

 Here is a shot of the lotus in progress.  The lotus is a recurring element in my work.  I've been wanting to make a purple one for a long time now so here it is!

Here is a shot of the rose in progress.  I've always really loved roses but if I had to choose which one I love the most, it might be the orange one.

Above you can see part of the grouting process.  I grouted all the flowers at the same time.  Seeing them all come alive at the same time was very rewarding.

Here is an Instagram shot I took of the view from my studio window while finishing up my mosaic flower project.  Part of Kyle's stair garden is seen framing the beautiful view of the trees I get to enjoy everyday.  Though out the summer, we watched the flowers blossom and attract the humming birds - it really was a treat and it inspired this little series.  In September I took this photo thinking about how beautiful the rainy day was and how it made the flowers really stand out.  At that time, I had no idea how much rain we were going to get in Boulder - that was the beginning of the big flood before we had to evacuate from our home.  I had to put my project on hold while we were displaced.  Eventually we got to visit our home for a few hours at a time and I got to come back to glue the flowers on day and then a few days later we came back to grout.  Despite all that we had to deal with as a result of this natural disaster, I had to do my best to complete my project and it felt really good to sneak in a few hours of studio time during the five weeks we've been away from our home.  

Sanitas Valley

$
0
0
Sanitas Valley - Spring, stained glass mosaic 24" x 24", 2013   available for purchase

I've taken lots of photos of Sanitas Valley as I come here often because its pretty close to where I live.  Here in Colorado, there are infinite places to hike around and to challenge yourself going up all the high peaks.  I often like to take the more relaxing path, one like this where I can simply enjoy something beautiful while taking an easy morning stroll taking in a familiar view which I've really grown to love in all seasons and all times of day. This is the photo I chose to base the composition for my mosaic rendition. 

 
Above is the charcoal pencil sketch I created for the Sanitas Valley mosaic series.  This black and white sketch isn't only the basis for my latest mosaic "Sanitas Valley - Spring" but it will also be used to create a winter, fall and summer version, maybe even a night time scene with as starry night sky.

Sanitas Valley is a pleasant and rewarding trail between the  the Hogback Ridge and Mount Sanitas with a perfect view of Green mountain which is one of the high peaks here in Boulder.  It is one of my favorite trails here in town and I visit it often.  From the first stroll down this path, I knew I either wanted to draw this place or to create a mosaic tribute to it.  I've walked here during every season and decided that I wanted to recreate the spring version first.  Day after day I went in spring, waiting to see an abundance of purple flowers ... I had no luck, maybe bad timing.  I saw lots and lots of yellows =)  So I reluctantly decided to go with the yellow flower fields as seen in my sketch above.

Once I had all my concepts ready, I printed out an enlarged version of my sketch.  Once all pieced together, this is where I arrange all my glass - its a map of sorts.

Little did I know that this mosaic was meant to be purple from the start.  When I started laying out my color palette in glass, yellow just didn't make any sense so I decided to wing it and started pulling out my purples.  I took a deep breath and began to create the spring version of Sanitas Valley I wanted from the start.  I live up in the canyon about 30 minutes out of town in the mountains and don't always make it down to the local trails to see all the flowers blossom so I tell myself that I must have just missed the purples =)

Here is a shot of the mosaic all ready for gluing and after it all it turned out exactly as I planned initially - an impression of a crisp early morning in the spring when the ground is turning green in the mountains and the purple flowers are shooting up faster than you could count them.

I picked these grouting photos to share because I wanted everyone to see how the big green mountain is created using iridescent glass which creates wonderful effects in the changing light. Those psychedelic looking pines are actually forest green but when the light catches them right, they shimmer with a rainbow of color. The circles in the sky as well as in the flower fields are also iridescent so they have a similar effect.

2014 Stained Glass Mosaic Class

$
0
0

As many of you know I will be teaching a Stained Glass Mosaic Class at the Art Garage in Denver at the beginning of next year.  It will be a four week long class for beginners where the students will learn the basics of stained glass mosaics while creating and completing their own, unique compositions.  More info coming soon!  Please email me with any questions: kpolkowska@gmail.com

Turquoise Lotus Flower

$
0
0

"Turquoise Lotus Flower", stained glass mosaic, 22" x 22" (23" x 23"), 2013
Available for Sale Via my Online Shop: http://kasiamosaicsstore.blogspot.com/

Here is a look at the beginning stages of the project.

I hand cut all the petals by these three basic glass tools.

 A closer look at the center, created with all hand cut circles.

 The mosaic is all glued and the tape is peeled away.

 Grouting is my favorite part of the process! 

Article 0

$
0
0
As 2013 quickly approaches the end, I'm looking back on this year's projects and making plans for the new year. Some of the mosaics I'm planning for 2014 are Colorado and Montana inspired landscapes, a self-portrait, an owl or two, a series of lotus flowers ... mhhh can't give everything away just yet but it will be a busy year for sure Happy New Year to All!

Fiery Lotus Flower

$
0
0
Fiery Lotus, stained glass mosaic, 11.5" x 11.5", 2014

available for sale: http://kasiamosaicsstore.blogspot.com/


In this photo I tried to catch some of the light reflecting on the textures of the glass. This effect takes some of the color away so I almost never photograph my mosaics this way as I'm a major color freak So just imagine it a little bit more saturated in the areas where the light hits Hard to capture all the qualities of a glass mosaic in one shot ...

First day back in the studio following the latest near three week hiatus ... so easily I was consumed with new projects ... literally I was being one with the glass that day =)

 The mosaic all cut and arranged before glueing!

Grouting in charcoal sanded grout - my favorite part =)

The Dallas Divide

$
0
0
The Dallas Divide, stained glass mosaic, 16" x 48", 2014   available for sale

In September 2012, Kyle and I were planning a trip to the San Juan Mountains here in Colorado.  Due to the epic flood, being displaced from home for nearly six weeks and all that comes with natural disaster, we had to cancel our plans ... This mosaic is my way of visiting the mountains I dreamed of seeing this fall but couldn't.  Below are a few process shot of the making of "The Dallas Divide".


The beginning ... spontaneously working on a very rough sketch.

The aspens are done; some are created with larger shapes of glass while others are made with individual little, aspen leaf shapes. Now onto the pines, then the mountains and the sky!


Here is a good size comparison of the little, hand carved aspen leaves next to my hand.


Here is one of three sections of pines I added to the composition.  All the little trees are created with the three hand tools seen in the bottom right of the photo. 


Here you can see one of my freehand cut mountains created with the same three tools I used to create all the other shapes in my mosaic.  I carefully scored and carved my Rocky Mountains while hoping that my beautiful glass wouldn't CRACK! My initial plan was to make them of many, many little rocks I'd cut out by hand to depict the very, rocky peaks we have here in Colorado.  Anyone who's climbed some of the big mountains here, knows exactly what I'm talking about - it is pretty mind blowing to experience in person!  But the beauty of the glass I chose for this project altered my plans.  I decided to show the overall impression that all those rocks make together to create the illusion of one solid mountain rather than focusing on the many, many parts that make a whole.   

Here I am using the other half sheet of this awesome glass to start the process of creating the mountains on the left side.

 The blue Colorado sky is coming alive!


 Before sectioning off the taped mosaic for gluing.

Here I am holding up one of the sections before gluing it down.  The the glass tesserae are held together on the face with clear tape - that's why I can hold them up this way =)

 Last but not least, actually my favorite part, is the grouting.  Here I am grouting my mosaics in a sanded charcoal grout.

Purple and Blue Lotus Flower Set

$
0
0

Blue Lotus Flower on Purple, stained glass mosaic, 22" x 22" (23" x 23" framed), 2014    $950   
available for sale: http://kasiamosaicsstore.blogspot.com/

Purple and Blue Combination Lotus Flower, stained glass mosaic, 22" x 22" (23" x 23" framed), 2014    $950  
available for sale: http://kasiamosaicsstore.blogspot.com/

Purple Lotus Flower on Blue, stained glass mosaic, 22" x 22" (23" x 23" framed), 2014    $950   
available for sale: http://kasiamosaicsstore.blogspot.com/

Glass selection.


Hand-cutting all the glass petals.

The three flowers coming along.  Deciding on the colors for the centers as well as for the backgrounds.

Hand cutting all the glass circles with my steal flat head tile nippers

Ready to glue!

 Grouting!
 

Mosaic Flower Workshop

$
0
0

Longmont, Colorado February 2014 

____________________________________________________________________________ Accepted payments for the class: Checks and PayPal 

Click the Paypal button above to proceed to check out or email kpolkowska@gmail.com to pay with check

 __________________________________________________________________________

Mosaic Flower Workshop at The Firehouse Art Center in Longmont, CO (Feb.28 - March 2). This will be a three day class where the students will have a choice of a few flower templates which I'm creating especially for the class. No previous mosaic experience or drawing skills needed - I will guide everyone from start to finish and the students will all take home a beautiful and professionally framed flower (frames will be custom made by my partner Kyle). 


Note: My Lotus Flowers are only used for promotional purposes, the templates I will provide will be similar but the students will not be making that exact flower as its part of my ongoing series.

Flower Series Continued ...

$
0
0
Blue Dahlia, stained glass mosaic, 11"x11" (12"x12" framed), 2014
Available for Sale via the Kasia Mosaics Store

 Some of the process ...

Yellow Daffodil, stained glass mosaic, 11"x11" (12"x12" framed), 2014
Available for Sale via the Kasia Mosaics Store

  Some of the process ...

Red Sunflower, stained glass mosaic, 11"x11" (12"x12" framed), 2014
Available for Sale via the Kasia Mosaics Store

  Some of the process ...

Lavender Lotus Flower, stained glass mosaic, 11"x11" (12"x12" framed), 2014
Available for Sale via the Kasia Mosaics Store

  Some of the process ...

Tangerine Gerbera Daisy, stained glass mosaic, 11"x11" (12"x12" framed), 2014
Available for Sale via the Kasia Mosaics Store

 Some of the process ...


Pink Dahlia

$
0
0
Pink Dahlia, stained glass mosaic, 17.5" x 17.5" (19" x 19" framed), 2014    
Available for Sale: http://kasiamosaicsstore.blogspot.com/ 

Cutting and Arranging Process:  All the glass in the mosaic is hand cut by me.

Grouting Process


Purple Spiral

$
0
0
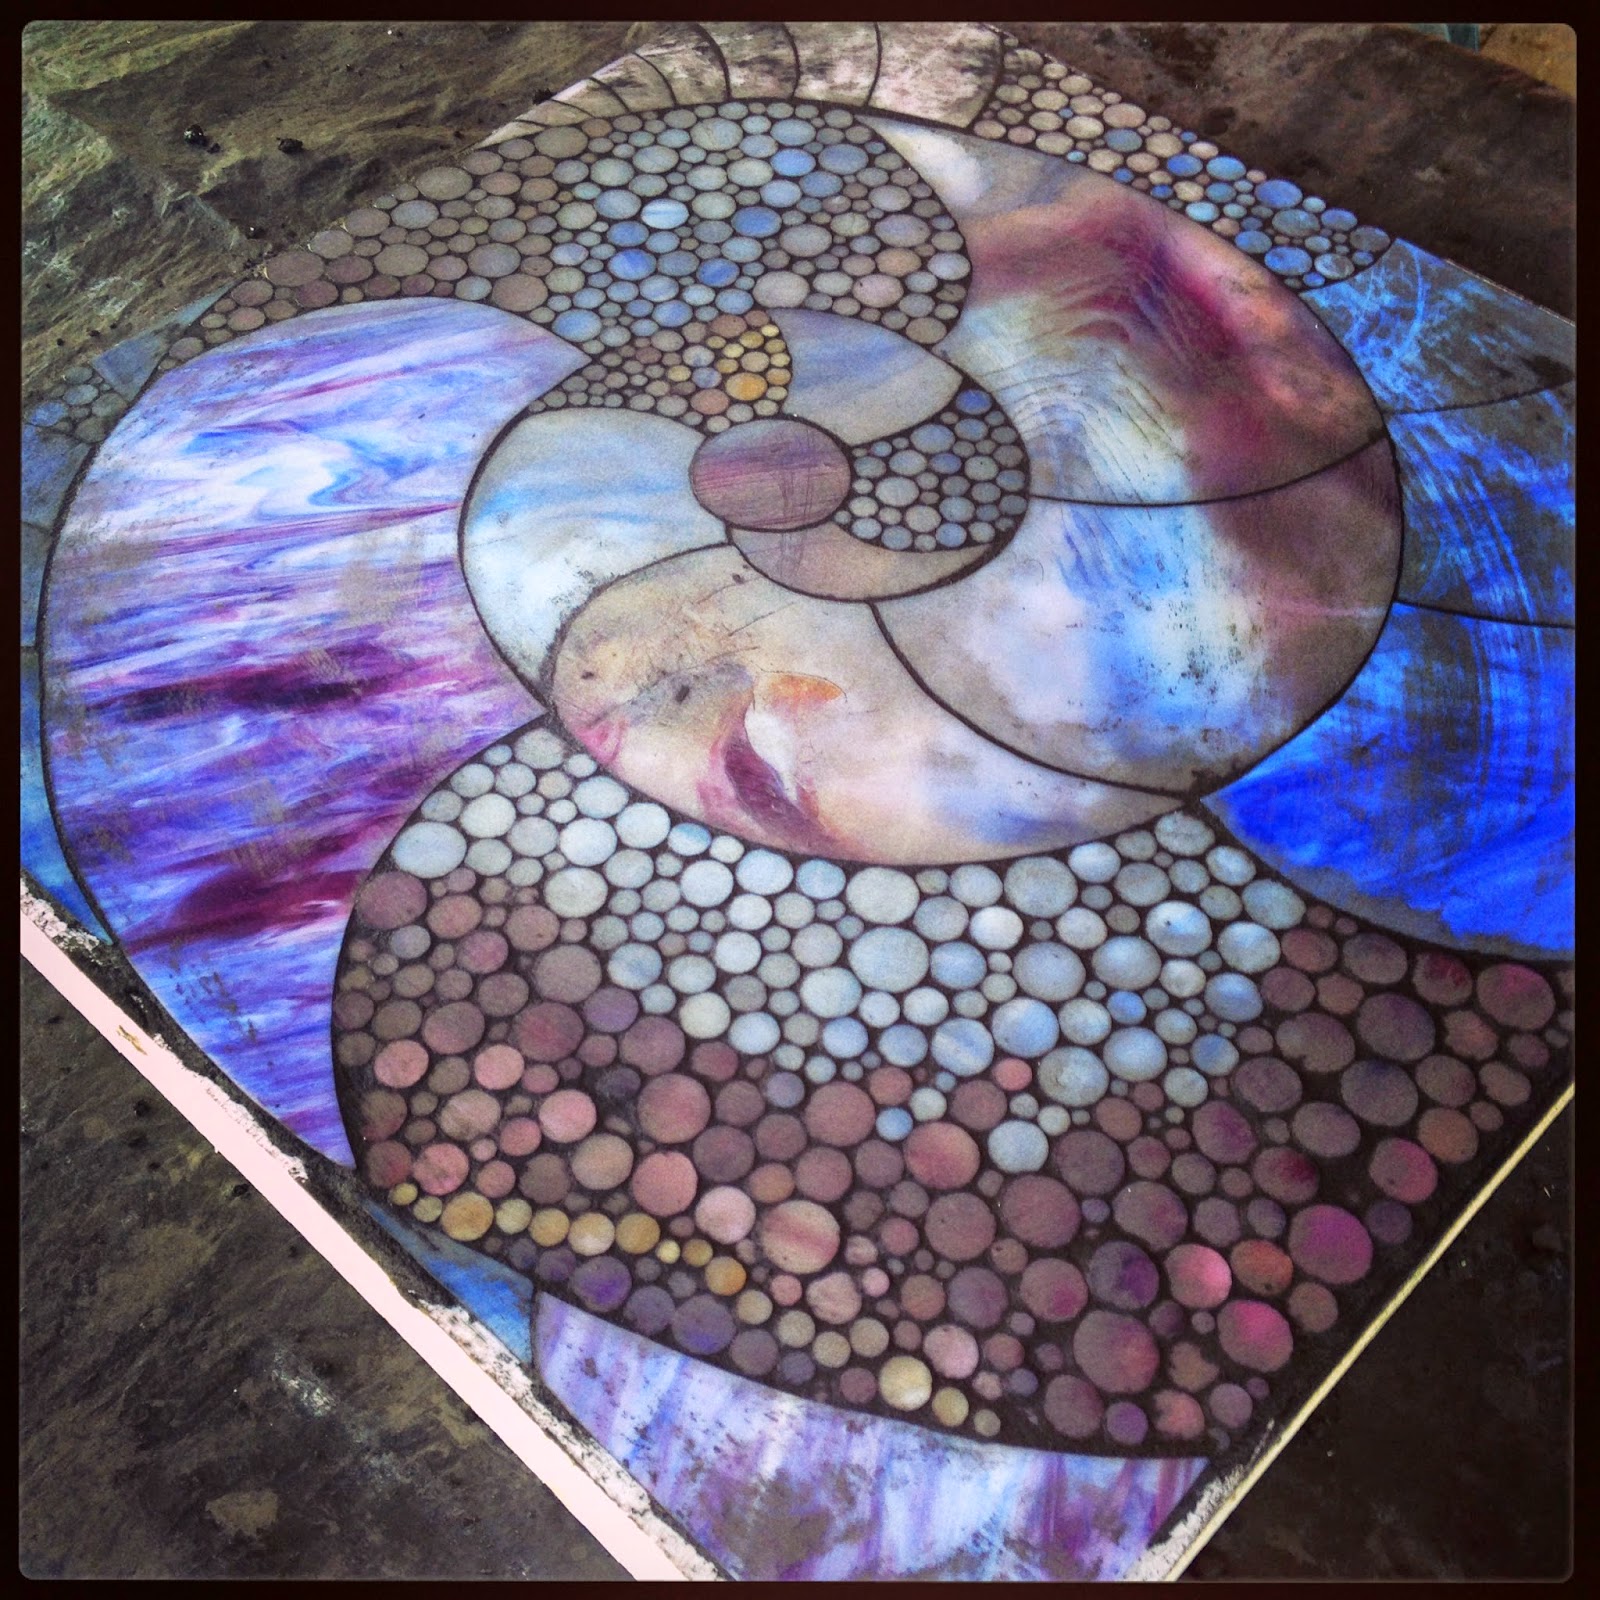
Purple Spiral, stained glass mosaic, 18" x 18" (19" x 19" framed), 2014 available for sale

 The beginning ...

 Progress and size comparison.

 The color dilemma!

Grouting!

Article 1

$
0
0

Montclair, New Jersey May 2014 


______________________________________________________________ 
Class is limited to ten students. To reserve your spot in the class sign up either clicking the paypal button below or email Kasia kpolkowska@gmail.com to mail a check.

___________________________________________________

Summary: This will be a two day mosaic intensive where the student will create a 12" x 12" custom framed mosaic art piece while learning the whole mosaic process from start to finish.  No previous mosaic or drawing experience needed as Kasia will guide the students through the process and provide special flower templates for the projects.  All the designs are created by Kasia with the intention to teach the use of repetitive shapes to create a successful mosaic while practicing cutting glass into curvy shapes - an essential skill in the kind of art Kasia creates.  The designs are well suited for a beginner allowing him or her to complete the project during class time though each one can also be utilized by an intermediate student  who chooses to put more detail into the design or to add their own flair.  


Cost: $265 ($210 class fee plus $55 material fee) all materials, use of all tools, additional templates to take home plus a 10 page colorful pdf summarizing everything covered in class plus more


When: May 3rd and 4th, 2014 (Sat 10am - 5pm with 1 hr lunch break, Sun 10am - 5pm with a 1 hr lunch break)


Where: 73 See Gallery in Montclair, New Jersey


Please email Kasia with any questions: kpolkowska@gmail.com

New Flower Designs for Upcoming Workshops

$
0
0
Purple Water Lily, stained glass mosaic, 11"x11" (12"x12" framed), 2014


Aqua Lotus with Yellow Center, stained glass mosaic, 11"x11" (12"x12" framed), 2014 

I designed these flowers for an upcoming workshop I am teaching in Montclair, NJ May 3-4, 2014.  To see a list of all of my upcoming classes and to sign up Click Here.  Below are a few shots of the process which the students will be learning in class.
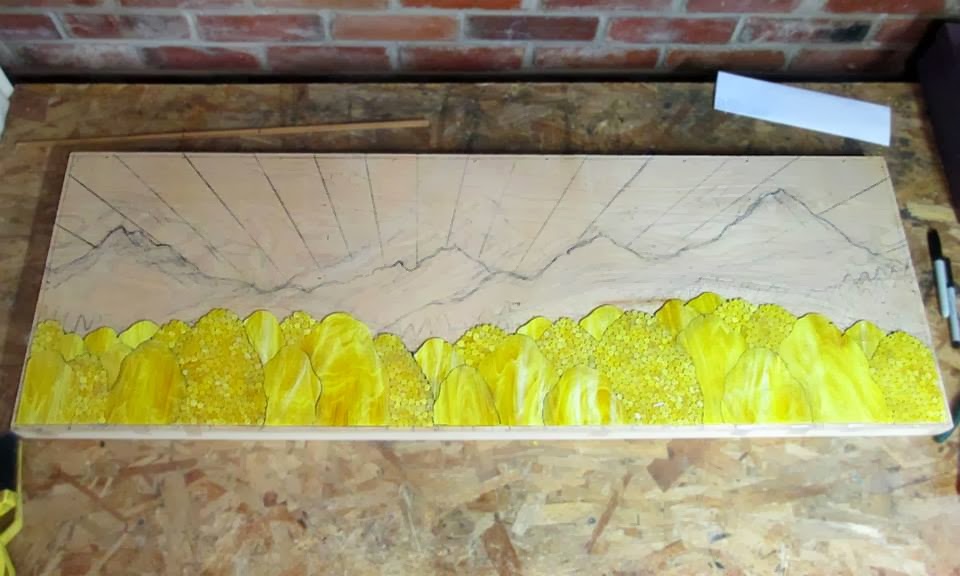
 Cutting and arranging the flower petals.


The mosaic glued and ready for grouting.


Grouting.


All the petals cut and arranged.  

 Size comparison.


Before grouting.

Impressions of a Colorado Fall

$
0
0
Impression of a Colorado Fall, stained glass mosaic, 36" x 36", 2013  available for purchase


This landscape has been inspired by my impression of the changing, vibrant aspen trees in the Rocky Mountains of Colorado where I live. Aspens live in large colonies and many share one root system so they change colors within their group and that's one of the reasons the fall foliage is so incredible in the mountainous Colorado landscape. While the colors transition from green to yellow, the barren rocky peaks begin getting snow peaked which creates a wonderful accent to the golden landscape.
  
Here is my rough concept sketch for the mosaic.  It is done in charcoal and colored pencil and is 11" x 11".
 
Yummy ingredients for the green aspens turning yellow and for the the sunny Colorado Mountains =)
Here I am arranging my hand cut circles into a little hill. In my mosaic this hill is in the foreground and will represent a sunlit slope covered in dried grass and plants. In the photo on the left I am making sure that my pieces are positioned as I want them before putting a little piece of tape over them. On the right you can already see a taped section and I am just dropping one of my circles into its proper spot before reevaluating the composition and colors and figuring out what my next circle should be =)
In this photo sequence, I am cutting out one of the trees for the tree covered mountains in my mosaic. When I create a deciduous trees, I first draw an outline of the crown with a sharpie. If there is already a tree next two it, I also trace the shape underneath it. Then I score my lines with my glass scoring tool. Then I break the glass along the scored lines with my running pliers. If there are any irregular edges left, I clean them up with my nippers. Then I fit my tree into its desired place. If its a good fit, then I tape it to its neighbor. If its not a good fit, then I shape it some more until it fits into place. The trees in this photo are in the foreground so they are pretty large and will gradually get smaller in size as they go back in space and up the mountain. I repeat this process for every single tree, some of them are a lot more complicated with more concave cuts which require a lot more scoring, breaking, nipping and shaping.
Late night in the studio ... I was making good progress on the project with the help of a local brew - this Colorado Ale could not have been a better color match for this Colorado inspired landscape =) I often subconsciously match my work clothes to the projects on my work bench ... but matching my beverage choice is a first :-)
progress shot from the studio
glass shards taking over the studio floor - its fun to watch the little glass mountain grow at my feet =)
Here I am ready for gluing! This is one of my mosaic puzzle pieces I cut up for my gluing process. I've held it up to the view out my studio window though I went outside to have Kyle take the picture.

Due to the large size of this mosaic (3ft by 3ft), I cut up my finished and fully taped mosaic into smaller more manageable sections for easier gluing - its like a very simple puzzle. After cutting out each piece, I carefully lift up the edges before fully lifting it up to see that all the glass is still adhering to the tape, if there are some loose pieces then I place the edges back down pat down the piece in the trouble sections. Then I transfer each puzzle piece, one by one onto my free side table. After each puzzle piece is lifted off, I trace it with a pencil to make sure it goes back into its proper spot so the mosaic won't overlap the board - that would be a bit of a boo boo =) I glue each section one by one onto its corresponding shape on my sealed substrate. (Currently I am using Weldbond as my glue and as my sealer - diluted 5 to 1 water to Weldbond)

Here I am gluing my mosaic puzzle pieces one by one onto my custom lightweight plywood substrates reinforced with structural frames on the back. The substrate is sealed with a 5 to 1 part water to Weldbond. I spread a thin layer of Weldbond onto both the board and the back of the mosaic, wait a couple minutes for the glue to get a bit tacky, carefully position a mosaic section onto its corresponding section on the board, shift it around a bit and gently but firmly I pat down all the glass pieces to make sure they all make good contact with the glue and board.
Here is another gluing process collage. Sometimes I try to squeeze the glue out in nice and even lines but this only happens when Kyle is looking over my shoulder. When he is not around I frantically squeeze the glue bottle and make abstract paintings with my Weldbond =) I apply the glue in thin layers to the back of the mosaic as well as to the board. I wait a couple minutes for the glue to get a bit tacky and join the two sections, press down on every piece of glass to make sure they make good contact and then leave it to dry before pulling off the tape.
Here is one last shot of the gluing process of this latest mosaic ... we took a bunch of pics this time around so it was hard to choose just one to share =) I like this little sequence of photos because the bottom right shows most of the mosaic glued but without the black grout lines (yet) which will really make the whole composition pop and look a lot more contrasty! Again you can see how I apply the glue to both the sealed substrate as well as the back of the mosaic. Then I carefully place the mosaic section onto the glued substrate section and then press down on each individual glass circle with my hand and a little cloth.
Here I am starting to peel of some of the tape from the sections that appeared mostly dried.  I pulled of the tape from the sky first as you can see in this photo.
Here are some shots from the grouting process. I used my favorite charcoal black sanded grout. (the perspective of the photo in the upper left makes the mosaic look smaller than it really is which is 3ft by 3ft)


Upcoming Workshops

$
0
0

Upcoming Classes in the Kasia Mosaics Studio in Boulder, Colorado

  • Stained Glass Mosaic Flower Workshop - Kasia Mosaics Studio, Boulder, Colorado May 17-18, 2014
  • Stained Glass Mosaic Flower Workshop - Kasia Mosaics Studio, Boulder, Colorado June 14-15, 2014

The classes will take place in my personal art studio.  Space in the class will be limited to 4-6 students, lunch and refreshments will be provided both days, all tools and materials including a custom built frame and flower templates will be included in cost of class.  

.

____________________________________________________________________________ 
Each class is limited to six students. To reserve your spot in the class sign up either clicking the paypal button below or email Kasia kpolkowska@gmail.com to mail a check.
____________________________________________________________________________
Sign Up For: Stained Glass Mosaic Workshop May 17-18, 2014

Quantity
____________________________________________________________________________
Sign Up For: Stained Glass Mosaic Workshop  June 14-15, 2014
____________________________________________________________________________

Summary: This will be a two day mosaic intensive where the student will create a 12" x 12" custom framed mosaic art piece while learning the whole mosaic process from start to finish.  No previous mosaic or drawing experience needed as Kasia will guide the students through the process and provide special flower templates for the projects.  All the designs are created by Kasia with the intention to teach the use of repetitive shapes to create a successful mosaic while practicing cutting glass into curvy shapes - an essential skill in the kind of art Kasia creates.  The designs are well suited for a beginner allowing him or her to complete the project during class time though each one can also be utilized by an intermediate student  who chooses to put more detail into the design or to add their own flair.  


Cost: $275 The price of the class covers all materials, use of all tools, additional templates to take home, a 10 page colorful pdf summarizing everything covered in class as well as lunch and refreshments during both days.


When:  There are two options listed below:


May 17-18, 2014 (Sat 10am - 5pm with 1 hr lunch break and lunch provided, Sun 10am - 5pm with a 1 hr lunch break and lunch provided)


June 14-15, 2014 (Sat 10am - 5pm with 1 hr lunch break and lunch provided, Sun 10am - 5pm with a 1 hr lunch break and lunch provided)


Where: 6231 Fourmile Canyon Drive, Boulder, CO


Please email Kasia with any questions: kpolkowska@gmail.com

Article 0

$
0
0

Upcoming Classes in the Kasia Mosaics Studio in Boulder, Colorado

  • Stained Glass Mosaic Flower Workshop - Kasia Mosaics Studio, Boulder, Colorado June 7-8, 2014
  • Stained Glass Mosaic Flower Workshop - Kasia Mosaics Studio, Boulder, Colorado June 14-15, 2014

The classes will take place in my personal art studio.  Space in the class will be limited to four students, lunch and refreshments will be provided both days, all tools and materials including a custom built frame and flower templates will be included in cost of class.  

.


____________________________________________________________________________ 
Each class is currently limited to four students. To reserve your spot in the class sign up either clicking the paypal button below or email Kasia kpolkowska@gmail.com to mail a check.
____________________________________________________________________________
Sign Up For: Stained Glass Mosaic Workshop June 7-8, 2014

Quantity
____________________________________________________________________________
Sign Up For: Stained Glass Mosaic Workshop  June 14-15, 2014
____________________________________________________________________________

Summary: This will be a two day mosaic intensive where the student will create a 12" x 12" custom framed mosaic art piece while learning the whole mosaic process from start to finish.  No previous mosaic or drawing experience needed as Kasia will guide the students through the process and provide special flower templates for the projects.  All the designs are created by Kasia with the intention to teach the use of repetitive shapes to create a successful mosaic while practicing cutting glass into curvy shapes - an essential skill in the kind of art Kasia creates.  The designs are well suited for a beginner allowing him or her to complete the project during class time though each one can also be utilized by an intermediate student  who chooses to put more detail into the design or to add their own flair.  


Cost: $275 The price of the class covers all materials, use of all tools, additional templates to take home, a 10 page colorful pdf summarizing everything covered in class as well as lunch and refreshments during both days.


When:  There are two options listed below:


June 7-8, 2014 (Sat 10am - 5pm with 1 hr lunch break and lunch provided, Sun 10am - 5pm with a 1 hr lunch break and lunch provided)


June 14-15, 2014 (Sat 10am - 5pm with 1 hr lunch break and lunch provided, Sun 10am - 5pm with a 1 hr lunch break and lunch provided)


Where: 6231 Fourmile Canyon Drive, Boulder, CO


Please email Kasia with any questions: kpolkowska@gmail.com

Impressions of a Colorado Fall

$
0
0
Impression of a Colorado Fall, stained glass mosaic, 36" x 36", 2013  available for purchase


This landscape has been inspired by my impression of the changing, vibrant aspen trees in the Rocky Mountains of Colorado where I live. Aspens live in large colonies and many share one root system so they change colors within their group and that's one of the reasons the fall foliage is so incredible in the mountainous Colorado landscape. While the colors transition from green to yellow, the barren rocky peaks begin getting snow peaked which creates a wonderful accent to the golden landscape.
  
Here is my rough concept sketch for the mosaic.  It is done in charcoal and colored pencil and is 11" x 11".
 
Yummy ingredients for the green aspens turning yellow and for the the sunny Colorado Mountains =)
Here I am arranging my hand cut circles into a little hill. In my mosaic this hill is in the foreground and will represent a sunlit slope covered in dried grass and plants. In the photo on the left I am making sure that my pieces are positioned as I want them before putting a little piece of tape over them. On the right you can already see a taped section and I am just dropping one of my circles into its proper spot before reevaluating the composition and colors and figuring out what my next circle should be =)
In this photo sequence, I am cutting out one of the trees for the tree covered mountains in my mosaic. When I create a deciduous trees, I first draw an outline of the crown with a sharpie. If there is already a tree next two it, I also trace the shape underneath it. Then I score my lines with my glass scoring tool. Then I break the glass along the scored lines with my running pliers. If there are any irregular edges left, I clean them up with my nippers. Then I fit my tree into its desired place. If its a good fit, then I tape it to its neighbor. If its not a good fit, then I shape it some more until it fits into place. The trees in this photo are in the foreground so they are pretty large and will gradually get smaller in size as they go back in space and up the mountain. I repeat this process for every single tree, some of them are a lot more complicated with more concave cuts which require a lot more scoring, breaking, nipping and shaping.
Late night in the studio ... I was making good progress on the project with the help of a local brew - this Colorado Ale could not have been a better color match for this Colorado inspired landscape =) I often subconsciously match my work clothes to the projects on my work bench ... but matching my beverage choice is a first :-)
progress shot from the studio
glass shards taking over the studio floor - its fun to watch the little glass mountain grow at my feet =)
Here I am ready for gluing! This is one of my mosaic puzzle pieces I cut up for my gluing process. I've held it up to the view out my studio window though I went outside to have Kyle take the picture.

Due to the large size of this mosaic (3ft by 3ft), I cut up my finished and fully taped mosaic into smaller more manageable sections for easier gluing - its like a very simple puzzle. After cutting out each piece, I carefully lift up the edges before fully lifting it up to see that all the glass is still adhering to the tape, if there are some loose pieces then I place the edges back down pat down the piece in the trouble sections. Then I transfer each puzzle piece, one by one onto my free side table. After each puzzle piece is lifted off, I trace it with a pencil to make sure it goes back into its proper spot so the mosaic won't overlap the board - that would be a bit of a boo boo =) I glue each section one by one onto its corresponding shape on my sealed substrate. (Currently I am using Weldbond as my glue and as my sealer - diluted 5 to 1 water to Weldbond)

Here I am gluing my mosaic puzzle pieces one by one onto my custom lightweight plywood substrates reinforced with structural frames on the back. The substrate is sealed with a 5 to 1 part water to Weldbond. I spread a thin layer of Weldbond onto both the board and the back of the mosaic, wait a couple minutes for the glue to get a bit tacky, carefully position a mosaic section onto its corresponding section on the board, shift it around a bit and gently but firmly I pat down all the glass pieces to make sure they all make good contact with the glue and board.
Here is another gluing process collage. Sometimes I try to squeeze the glue out in nice and even lines but this only happens when Kyle is looking over my shoulder. When he is not around I frantically squeeze the glue bottle and make abstract paintings with my Weldbond =) I apply the glue in thin layers to the back of the mosaic as well as to the board. I wait a couple minutes for the glue to get a bit tacky and join the two sections, press down on every piece of glass to make sure they make good contact and then leave it to dry before pulling off the tape.
Here is one last shot of the gluing process of this latest mosaic ... we took a bunch of pics this time around so it was hard to choose just one to share =) I like this little sequence of photos because the bottom right shows most of the mosaic glued but without the black grout lines (yet) which will really make the whole composition pop and look a lot more contrasty! Again you can see how I apply the glue to both the sealed substrate as well as the back of the mosaic. Then I carefully place the mosaic section onto the glued substrate section and then press down on each individual glass circle with my hand and a little cloth.
Here I am starting to peel of some of the tape from the sections that appeared mostly dried.  I pulled of the tape from the sky first as you can see in this photo.
Here are some shots from the grouting process. I used my favorite charcoal black sanded grout. (the perspective of the photo in the upper left makes the mosaic look smaller than it really is which is 3ft by 3ft)


New Landscape

$
0
0

Untitled (title to be determined), stained glass mosaic (framed), 24" x 48", 2014 by Kasia Polkowska
Available for Sale: http://kasiamosaicsstore.blogspot.com/

Several weeks ago in early spring, while driving on US 36 here between Lyons and Boulder, I was confronted with the most magical and serene view - I couldn't get it out of my head ... right away I knew that it was meant to be my next mosaic.  Actually I had to put my other very exciting project on hold because I needed to create this one so badly =-)
The drive on that road is really beautiful with the rolling foothills and our famous Boulder Mountains on display for all the cyclists and drivers to enjoy. The leaves on the trees were newly blossomed and everything was covered in an afternoon haze. The mountains and the sky almost became one as they created a peaceful backdrop for this lovely scene. It seemed kinda cloudy yet the sun was shining brightly underneath the thin layer of clouds. Right away my mind began to race as this mosaic began to come to life in my head during that lovely drive.
 Some of the progress before the sky ...

With the sky =)


Sectioned off for gluing.

 Grouting.
Viewing all 416 articles
Browse latest View live